Intro and Brief Recap
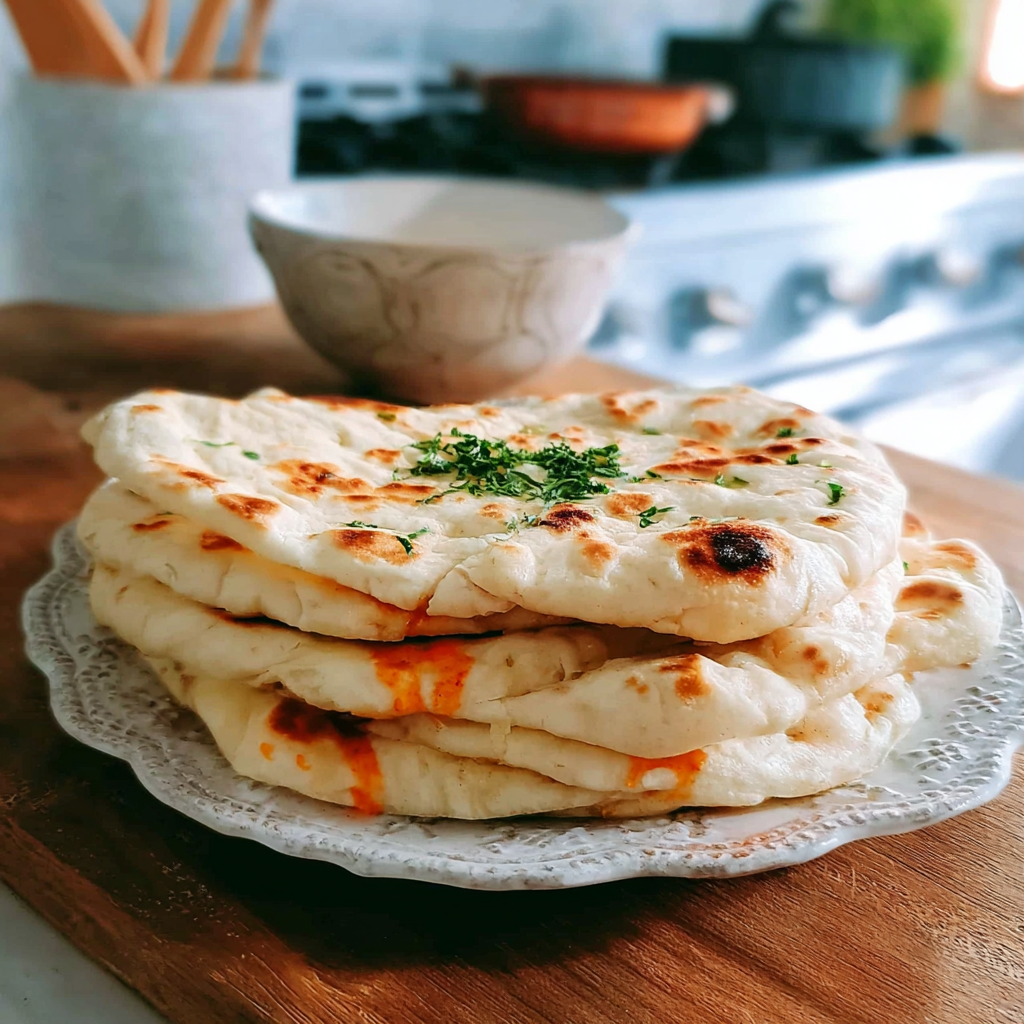
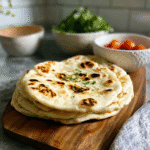
Have you ever tasted the warm, fluffy embrace of freshly baked pita bread? The moment you break it apart, its soft texture and slightly chewy nature invite you to explore countless delicious fillings. Homemade pita bread not only tastes better than store-bought options but also fills your kitchen with a heavenly aroma that can transport you to a sunny Mediterranean market.
I still remember the first time I made homemade pita bread with my grandmother. We spent an entire afternoon laughing and kneading dough, creating memories as delightful as the bread itself. Pita is perfect for family gatherings, barbecues, or a cozy night in with friends, whether filled with savory meats, vibrant veggies, or sweet spreads. So roll up your sleeves and prepare to experience the joy of creating this versatile bread from scratch!
Key Ingredients For Homemade Pita Bread
Here’s what you’ll need to make this delicious dish:
- All-Purpose Flour: This is the main ingredient for your pita dough. Choose unbleached all-purpose flour for the best texture and flavor.
- Warm Water: Use water heated to about 110°F (43°C) to activate the yeast effectively.
- Active Dry Yeast: Ensure your yeast is fresh for optimal rising. A quick proofing test in warm water can verify its potency.
- Salt: This enhances flavor and strengthens gluten structure in the dough.
- Olive Oil: Adding oil makes the dough more tender and adds richness. Use high-quality extra virgin olive oil for the best results.
The full ingredients list, including measurements, is provided in the recipe card directly below.
Instructions For Homemade Pita Bread
Follow these simple steps to prepare this delicious dish:
First Step : Activate the Yeast
In a small bowl, combine warm water and active dry yeast. Allow it to sit for about 5-10 minutes until frothy.
Second Step : Prepare the Dough
In a large mixing bowl, combine all-purpose flour and salt. Create a well in the center and add the activated yeast mixture along with olive oil. Mix until a shaggy dough forms.
Third Step : Knead the Dough
Transfer the dough onto a lightly floured surface and knead for about 8-10 minutes until it becomes smooth and elastic.
Fourth Step : Let It Rise
Place the kneaded dough into a greased bowl, cover it with a damp cloth, and let it rise in a warm spot for about 1 hour or until doubled in size.
Fifth Step : Shape the Pitas
After rising, punch down the dough gently. Divide it into equal portions (about 8-10 pieces), shape each piece into a ball, then flatten them into disks about 1/4 inch thick.
Sixth Step : Bake Your Pitas
Preheat your oven to 475°F (245°C) with a baking stone or an inverted baking sheet inside. Place pitas on parchment paper and bake for about 3-5 minutes until they puff up beautifully.
Transfer to plates and enjoy your homemade pita bread warm!
Expert Tips
Here are some helpful tips to ensure the best results for your dish:
- Use Fresh Ingredients: Ensure your yeast is fresh; expired yeast will not rise properly.
- Kneading Technique: Don’t rush through kneading; proper gluten development is key for soft pitas.
- Baking Temperature: Make sure your oven is fully preheated before baking to achieve that perfect puff.
- Storing Leftovers: Keep extra pitas in an airtight container at room temperature or freeze them for later use.
Preparation Tips
Homemade Pita Bread requires some simple techniques to achieve the best results. Begin by ensuring your ingredients are at room temperature, especially the water and yeast. This helps activate the yeast properly. Knead the dough thoroughly for about 10 minutes until it becomes smooth and elastic. Let it rise in a warm place until it doubles in size, which usually takes about an hour.
Baking Instructions
To bake your Homemade Pita Bread, preheat your oven to a high temperature, ideally around 475°F (245°C). Place a baking stone or baking sheet inside to heat up as well. Once the oven reaches the right temperature, roll out each piece of dough into thin rounds and quickly place them on the hot surface. Bake for 5-7 minutes until they puff up beautifully.
Serving Suggestions
This Homemade Pita Bread is perfect for various dishes. Serve it warm with dips like hummus or tzatziki. You can also use it as a wrap for fillings such as grilled vegetables, falafel, or shawarma. It complements salads wonderfully or can be enjoyed on its own with olive oil and herbs.
Storage Tips
To maintain the freshness of your Homemade Pita Bread, store it in an airtight container at room temperature for up to two days. For longer storage, freeze the bread after cooling completely. Wrap each pita individually in plastic wrap and place them in a freezer bag. Thaw them at room temperature whenever you crave fresh pita.
Presentation Ideas
This Homemade Pita Bread is versatile and pairs wonderfully with:
- Colorful vegetable platters featuring carrots, cucumbers, and bell peppers for dipping.
- Middle Eastern mezze boards that include olives, labneh, and baba ganoush.
- Aromatic stews like chicken shawarma or beef kofta served alongside warm pita.
FAQs
How do I make my Homemade Pita Bread puff up?
To ensure your Homemade Pita Bread puffs up while baking, it’s crucial to roll out the dough evenly and not too thickly. A consistent thickness allows for even cooking and proper steam buildup inside each pocket. Additionally, preheating your oven sufficiently will help create steam quickly when you place the dough inside, leading to that wonderful puffing effect.
Can I use whole wheat flour for my Homemade Pita Bread?
Yes! You can definitely use whole wheat flour to make your Homemade Pita Bread healthier. However, keep in mind that whole wheat flour may yield a denser bread compared to all-purpose flour. To achieve a lighter texture while using whole wheat flour, consider mixing it with all-purpose flour in equal parts.
What should I serve with my Homemade Pita Bread?
There are countless options for serving your Homemade Pita Bread! Pair it with dips like hummus or tzatziki for a delightful appetizer or snack. It also works great as a wrap for grilled meats or roasted vegetables. Adding fresh herbs and spices can elevate the flavors even more while making every meal feel special.
How long does Homemade Pita Bread last?
Homemade Pita Bread typically lasts about two days when stored at room temperature in an airtight container. If you want to preserve its freshness longer, consider freezing it once completely cooled. Properly wrapped pita can last up to three months in the freezer without losing its flavor or texture, making it easy to enjoy later on!
Homemade Pita Bread
- Prep Time: 15 minutes
- Cook Time: 5 minutes
- Total Time: 20 minutes
- Yield: Makes about 8 servings 1x
- Category: Bread
- Method: Baking
- Cuisine: Middle Eastern
Description
Pita bread is a delightful Middle Eastern staple that can elevate any meal with its warm, fluffy texture. Making homemade pita bread is simpler than you think, and the results are unbeatable. With just a few basic ingredients, you can create perfectly puffed pitas that serve as a canvas for savory fillings or dips. Imagine tearing into these fresh rounds, filled with your favorite ingredients, or simply dipped in olive oil and herbs. Experience the joy of baking this versatile bread from scratch!
Ingredients
- 2 cups all-purpose flour
- 1 tsp salt
- 1 tsp active dry yeast
- 1 tbsp olive oil
- 3/4 cup warm water (about 110°F)
Instructions
- Activate the Yeast: In a small bowl, mix warm water and yeast; let it sit for 5-10 minutes until frothy.
- Prepare the Dough: In a large bowl, combine flour and salt. Create a well, add the yeast mixture and olive oil; mix until shaggy dough forms.
- Knead the Dough: Transfer to a floured surface and knead for 8-10 minutes until smooth and elastic.
- Let It Rise: Place dough in a greased bowl, cover with a damp cloth, and let rise in a warm area for about 1 hour or until doubled.
- Shape the Pitas: Punch down dough, divide into 8 pieces, shape into balls, and flatten into disks about 1/4 inch thick.
- Bake Your Pitas: Preheat oven to 475°F with a baking stone inside. Place pitas on parchment paper and bake for 3-5 minutes until puffed.
Nutrition
- Serving Size: 1 pita (60g)
- Calories: 170
- Sugar: 0g
- Sodium: 240mg
- Fat: 3g
- Saturated Fat: 0.5g
- Unsaturated Fat: 2g
- Trans Fat: 0g
- Carbohydrates: 34g
- Fiber: 1g
- Protein: 5g
- Cholesterol: 0mg
Keywords: Ensure your yeast is fresh; expired yeast won't rise properly. For added flavor, incorporate herbs or spices into the dough. Store leftovers in an airtight container or freeze for later use.

Leave a Comment