Intro and Brief Recap
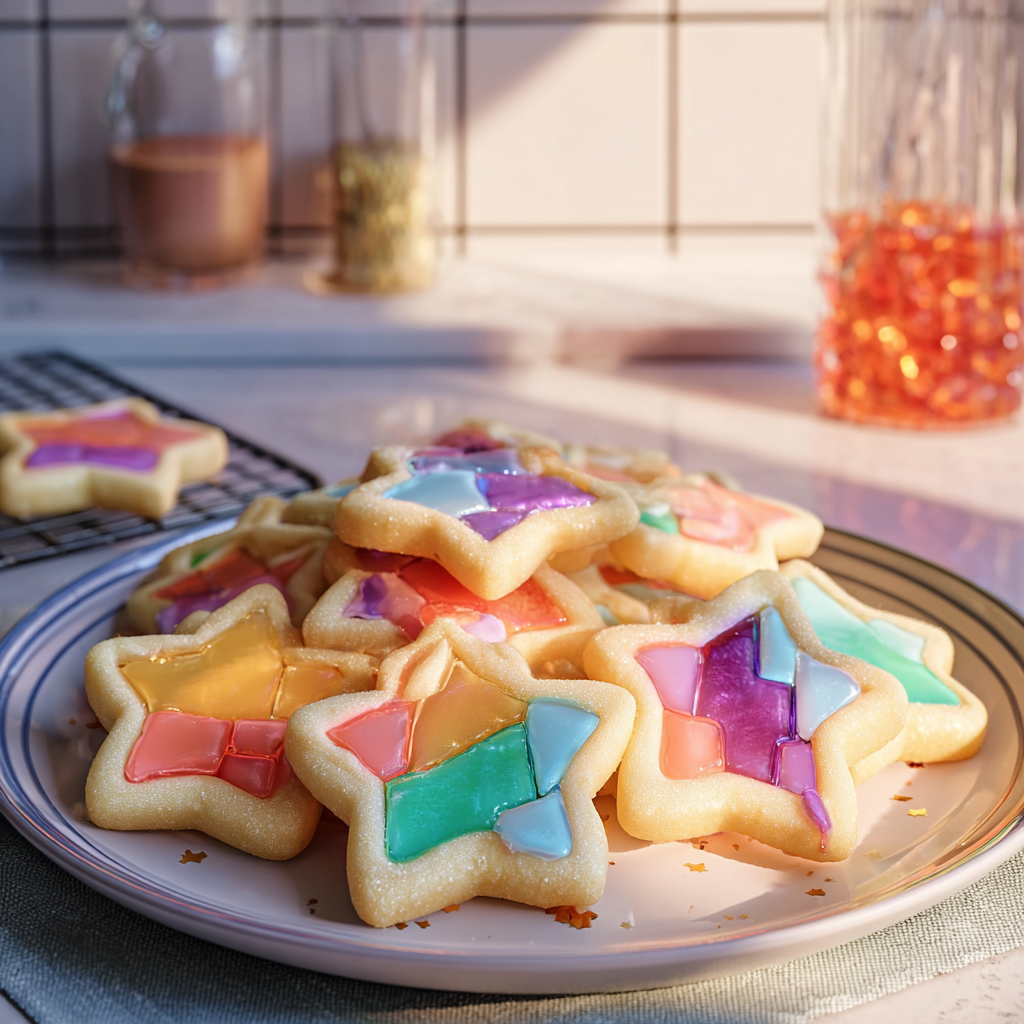
Have you ever gazed at a cookie and thought it looked like a work of art? Stained Glass Window Cookies are not just visually stunning; they bring a delightful crunch and a burst of fruity sweetness that captures your senses. These cookies combine the rich flavors of buttery dough with colorful candy windows that shimmer like stained glass, making them perfect for holiday gatherings or any celebration where you want to impress.
As a child, I remember baking these vibrant cookies with my grandmother every Christmas. The kitchen would fill with laughter as we rolled out the dough and carefully placed the crushed candies into the shapes we had cut. The anticipation of pulling them from the oven was always electric. These cookies not only brighten up any dessert table, but each bite offers a nostalgic reminder of cherished family moments. Get ready to create your own sweet memories with this delightful treat!
Key Ingredients For Stained Glass Window Cookies
Here’s what you’ll need to make this delicious dish:
- All-Purpose Flour: This forms the base of your cookie dough, providing structure and chewiness.
- Unsalted Butter: Use softened butter for a creamy texture that blends well with other ingredients.
- Sugar: Granulated sugar sweetens the dough, while brown sugar adds moisture and depth of flavor.
- Eggs: Eggs help bind the ingredients together and add richness to the cookies.
- Vanilla Extract: Pure vanilla extract enhances the flavor profile, making the cookies more aromatic.
- Baking Powder: This leavening agent helps the cookies rise slightly, giving them a light texture.
- Salt: A pinch of salt balances sweetness and enhances all the flavors in your dough.
- Candy (for windows): Choose colorful hard candies like Jolly Ranchers or Lifesavers to create beautiful stained glass effects.
The full ingredients list, including measurements, is provided in the recipe card directly below.
Instructions For Stained Glass Window Cookies
Follow these simple steps to prepare this delicious dish:
First Step: Prepare Your Oven and Baking Sheets
Preheat your oven to 350°F (175°C). Line two baking sheets with parchment paper to prevent sticking while baking.
Second Step: Make Cookie Dough
In a large mixing bowl, cream together softened unsalted butter and granulated sugar until light and fluffy. Then add eggs one at a time along with vanilla extract, mixing until well combined.
Third Step: Combine Dry Ingredients
In another bowl, whisk together all-purpose flour, baking powder, and salt. Gradually add this dry mixture into the butter mixture until fully incorporated.
Fourth Step: Roll Out Dough
Divide the dough into two equal portions. Roll out each portion between two sheets of parchment paper until about 1/4 inch thick. Chill in the refrigerator for at least 30 minutes.
Fifth Step: Cut Shapes
Once chilled, use cookie cutters to cut out shapes from your dough. Remove the centers using smaller cutters or shapes that create openings for candy windows.
Sixth Step: Add Candies
Place crushed candies in each opening of the cut-out shapes. Bake for about 8-10 minutes or until edges are lightly golden and candies have melted.
Transfer to wire racks to cool completely before serving for that perfect finishing touch!
Expert Tips
Here are some helpful tips to ensure the best results for your dish:
- Chill Your Dough: Always chill your cookie dough before rolling it out; this prevents spreading during baking.
- Use Quality Candy: Choose high-quality hard candies for vibrant colors that won’t fade when baked.
- Watch Baking Time: Keep an eye on your cookies as they bake; overcooking can lead to darkened edges or burnt candy centers.
Presentation Ideas
This Stained Glass Window Cookies recipe is versatile and pairs wonderfully with:
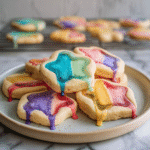
- Festive Platters: Arrange the cookies on a bright platter for holidays or special occasions. The colorful window designs create an eye-catching centerpiece that enhances your table setting.
- Gift Boxes: Package these cookies in decorative boxes as gifts. They not only taste great but also look stunning, making them perfect for sharing with friends and family during celebrations.
- Coffee Pairings: Serve these cookies alongside a warm cup of coffee or tea. The sweetness of the cookies complements the bitterness of the drinks, creating a delightful balance.
Tips for Baking Stained Glass Window Cookies
To achieve the best results with your Stained Glass Window Cookies, consider these helpful tips. First, ensure that your dough is chilled before rolling it out. This makes it easier to cut shapes without sticking. Next, use high-quality hard candies for the stained glass effect; they melt beautifully and create vibrant colors.
Pay attention to baking times as well. Keep an eye on your cookies as they bake to prevent them from overbaking or burning. Finally, allow the cookies to cool completely before removing them from the baking sheet. This helps maintain their shape.
Storing Stained Glass Window Cookies
Proper storage ensures that your Stained Glass Window Cookies remain fresh and delicious. Place the cooled cookies in an airtight container at room temperature. They will stay fresh for up to one week.
If you want to extend their shelf life, consider freezing them. Wrap each cookie individually in plastic wrap and then place them in a freezer-safe bag or container. They can last up to three months in the freezer without losing flavor.
Variations on Stained Glass Window Cookies
Experimenting with different flavors and colors can make your Stained Glass Window Cookies even more exciting. For example, try adding vanilla or almond extract to enhance the taste of your cookie dough. You can also use various colored candies to create unique designs that reflect different themes or seasons.
Consider using flavored candies, like sour or fruit-flavored options, to give your cookies an extra twist. Mixing and matching different colors and flavors can lead to beautiful results that surprise everyone.
FAQs
What are Stained Glass Window Cookies?
Stained Glass Window Cookies are delightful sugar cookies featuring cut-out shapes filled with melted hard candy that resembles stained glass windows when baked. These treats are especially popular during holidays due to their vibrant colors and festive appearance. The process involves rolling out sugar cookie dough, cutting out shapes, and filling them with crushed hard candies before baking until they melt into a glossy finish.
How do I make Stained Glass Window Cookies?
Making Stained Glass Window Cookies requires basic sugar cookie dough along with colorful hard candies for filling. Start by preparing your sugar cookie dough and chilling it for ease of handling. Roll out the dough, cut out desired shapes, then remove smaller inner shapes to create windows. Fill these cutouts with crushed hard candy pieces before baking as directed in your recipe.
Can I use different types of candies for my cookies?
Yes! You can experiment with various types of hard candies when making Stained Glass Window Cookies. Traditional options include Jolly Ranchers or Werther’s Originals because they melt well and retain vibrant colors after baking. Be cautious when selecting candies; avoid those containing chocolate or fillings that won’t melt into a clear state.
How do I decorate my Stained Glass Window Cookies?
Decorating Stained Glass Window Cookies can enhance their appearance further! After cooling completely, consider icing around the edges using royal icing for a polished look. You can also sprinkle edible glitter on top or add colored sanding sugar to give each cookie an extra sparkle while complementing its stained glass effect beautifully.
Stained Glass Window Cookies
- Prep Time: 30 minutes
- Cook Time: 10 minutes
- Total Time: 40 minutes
- Yield: Approximately 24 cookies 1x
- Category: Dessert
- Method: Baking
- Cuisine: American
Description
Stained Glass Window Cookies are a vibrant and artistic treat that combines buttery cookie dough with colorful hard candy “windows.” These delightful cookies not only look stunning but also deliver a satisfying crunch and a burst of fruity sweetness. Perfect for holiday gatherings or as a special gift, they evoke cherished memories and can be customized to suit any occasion.
Ingredients
- 2 ¾ cups all-purpose flour
- 1 cup unsalted butter, softened
- 1 cup granulated sugar
- ½ cup brown sugar, packed
- 2 large eggs
- 1 tsp vanilla extract
- 1 tsp baking powder
- ½ tsp salt
- 1 cup crushed hard candies (e.g., Jolly Ranchers)
Instructions
- Preheat your oven to 350°F (175°C) and line two baking sheets with parchment paper.
- In a large mixing bowl, cream together the softened butter, granulated sugar, and brown sugar until light and fluffy. Add the eggs one at a time along with vanilla extract, mixing until fully incorporated.
- In another bowl, whisk together the flour, baking powder, and salt. Gradually add this dry mixture to the wet ingredients until combined.
- Divide the dough into two portions and roll each out between parchment paper to about ¼ inch thick. Chill for at least 30 minutes.
- Cut out shapes from the chilled dough using cookie cutters and remove inner sections for candy windows. Fill these openings with crushed hard candies.
- Bake for 8-10 minutes or until the edges are lightly golden and candies have melted. Allow to cool completely on wire racks before serving.
Nutrition
- Serving Size: 1 cookie (30g)
- Calories: 150
- Sugar: 10g
- Sodium: 50mg
- Fat: 7g
- Saturated Fat: 4g
- Unsaturated Fat: 2g
- Trans Fat: 0g
- Carbohydrates: 20g
- Fiber: <1g
- Protein: 2g
- Cholesterol: 30mg
Keywords: To prevent spreading, always chill your dough before rolling it out. Opt for high-quality hard candies for vibrant colors that hold up during baking. For added flavor variations, consider incorporating almond extract or using flavored candies like sour options.


Leave a Comment